

Here is the quilt the second cousin who is getting married this year. It isn't very big, only about 12 x 16, but it is heavily thread sketched.

This is the invitation she sent me. I immediately recognized it as the beach by the Jupiter Resort where she is getting married. I'm pretty sure I have a picture of my family standing in that same spot. I had planned on quilting her a landscape, and I thought it would be fun to try to reproduce the scene from the invitation.
Now where to start?
Most of my landscapes have been made using Karen Eckmeier's Accidental Landscapes book.
However, I had bought Susan Brubaker Knapp's book, Point, Click, Quilt!, and had been dying to try it out. This book is great if you have a photo that you want to reproduce as a quilt. I had started on a water lily, but made the mistake of using the wrong fusible web. Needless to say, my Babylock won't quilt through that and the project had been abandoned. I figured this was my chance to try again.

I decided to combine both books. Lay out the background with Accidental Landscapes and Point, Click, Quilt! for the trees and bushes. I made my background and laid it out on the interfacing.
Now for the hard part. I needed a photo of the trees so I could trace the lines. I did take the invitation to the library and proved to myself that enlarging photos on fancy copiers is not my strong point. Somehow I managed to make the image even smaller. It then occurred to me that I have a perfectly acceptable camera and a working printer at my own house.
I used the close-up feature on my camera and picked one side of the invitation to zoom in. I printed it out and did the same for the other side.
I now had both sides of the trees the right size and ready for tracing.
I do not have any template plastic, but I do have loads of those little plastic sleeves with the 3 holes that you put in binders. I cut the edges off so I would have two pieces and traced the images.

Then I laid them over the background so I could get an idea of how it was going to look. I was getting really excited at this point. It was beginning to look like I could pull this off. I did have to add another piece of sand fabric to the right side, but no big deal.

After what felt like countless hours of cutting out fabric with tiny applique scissors (and a few red calluses too), I was able to fuse the trees and bushes on. Ideally this is done with Steam-a-seam 2 Lite. And I do mean 'Lite'. If you use the regular Steam-a-seam 2, good luck getting your needle to go through it later. All I had in the house was Wonder Under and I wanted to use it up. It works almost as well. The only difference is that the pieces to be fused don't lay as nicely. There's no grip on the back, so they shift easily. I had to go slowly and very carefully to make sure the pieces didn't move after I laid them where I wanted them.

Then came the fun part, thread sketching! It was a great opportunity to use up some of those Connecting Threads cones that I have. I had the whole collection of colors while I was quilting on my Jane, but it doesn't work well in the George. So I used Jane for the thread sketching. The tedious part of this is constantly changing colors.
Another thing I should have done was quilt the sky and the background before fusing on the trees. Hindsight is a wonderful thing. I had to keep stopping and starting lines. Very frustrating!

I'm still not sure I'm totally happy with the shading on the trees, but I'm not a painter, and this was as far as I was willing to go at that point. I did get the sky right though, if I do say so myself. I especially like the little bit of yellow at the horizon.
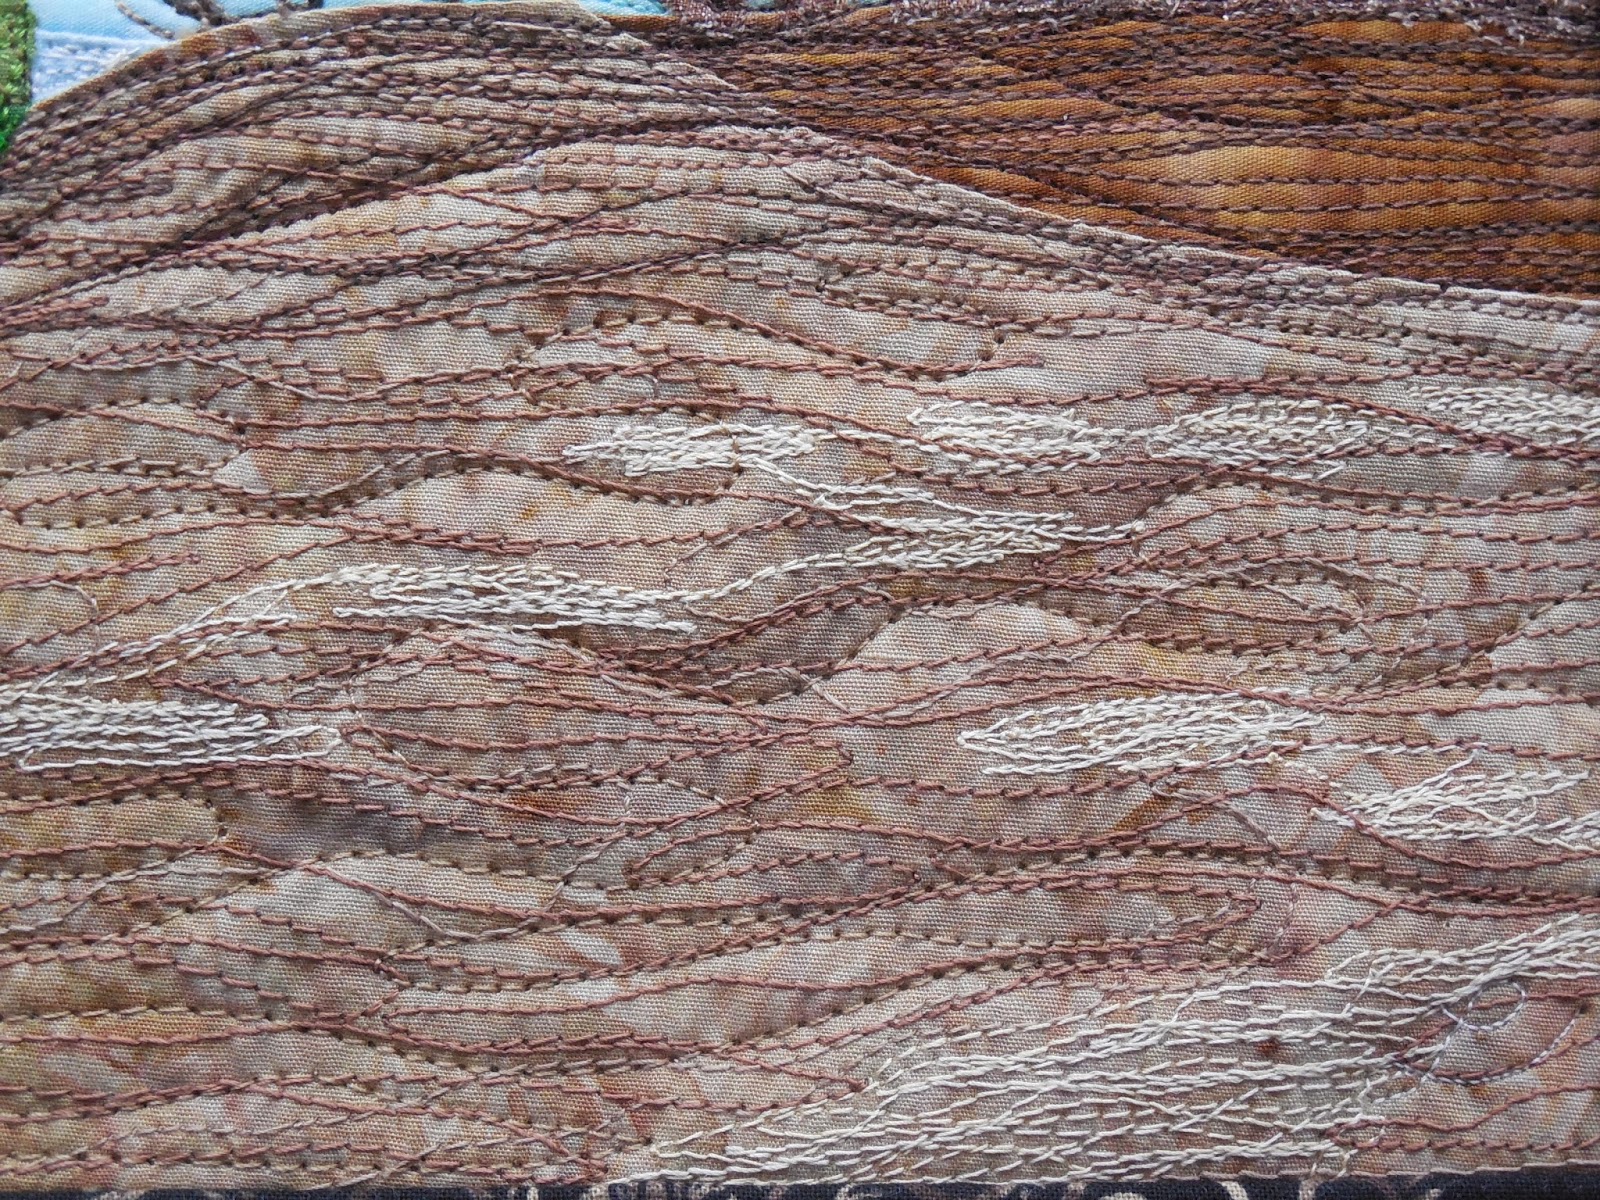
The sand is also heavily thread sketched to capture the shadows and the light coming through the trees.

I enjoyed capturing the light on the tree trunks. I think that turned out well.

The big bush, not so much. That bush was fused onto a very thick background though and it wasn't easy to get the needle through it. Maybe the layered background technique wasn't the best approach. It was a little too dense. I had to use George to quilt it when the sketching was done.

So there is the end result. You can see that the quilt is zoomed in a bit more than the invitation. That was not planned, but I'm glad of it. All those branches! I shudder! All in all, I'm happy with the result. I was sad to mail it away, but I hope my cousin will like it.
You are so smart! Awesome job!
ReplyDeleteHow could your cousin not love it! You did a wonderful job! It's absolutely a masterpiece!
ReplyDeleteGorgeous! And thanks for sharing how you did it. : )
ReplyDeleteAmazing and beautiful. So glad you've described your process. Thanks.
ReplyDeleteIt is so lovely! I am glad that my book was helpful to you. She is going to LOVE it.
ReplyDelete