Sunday, August 31, 2014

Bye Bye Hartley


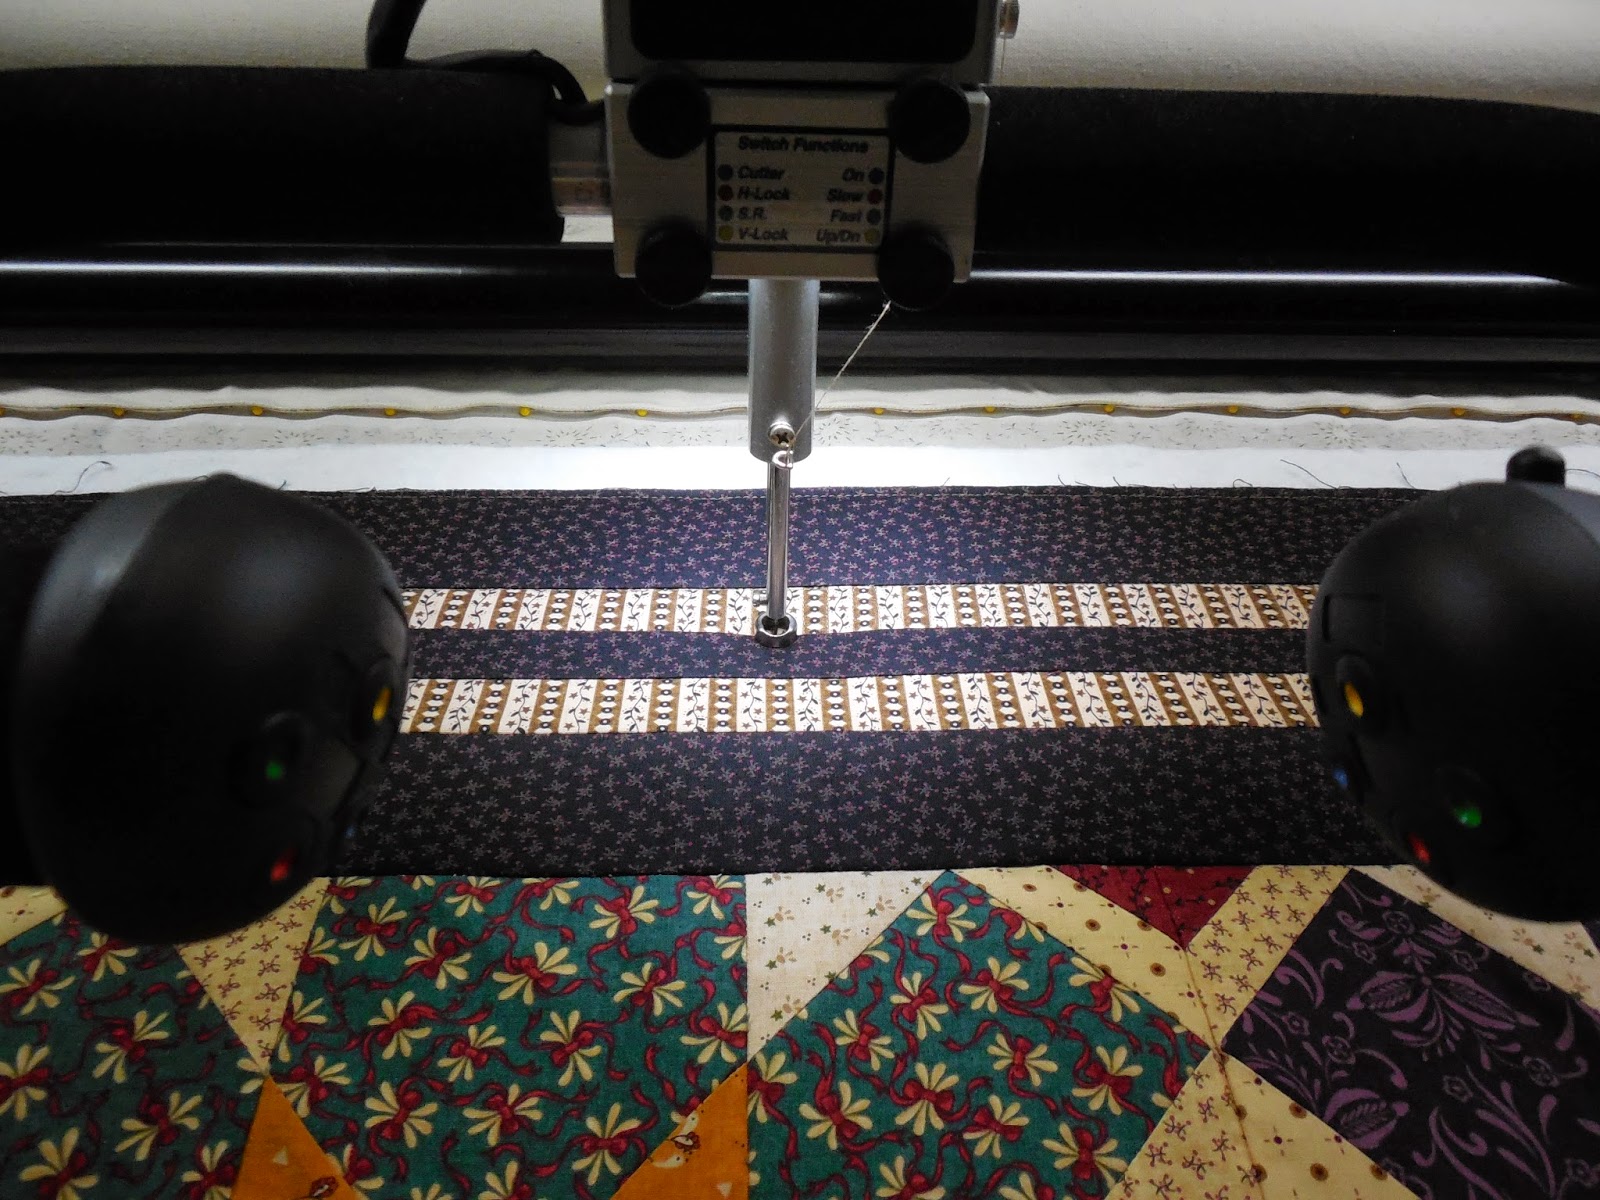
When I bought my Millie, she came with Hartley drive micro handles. These are supposed to be really helpful for precision work. I tried to use both hands on these handles, but it felt very awkward and constricting. Then I saw a Jamie Wallen You Tube video and he only had one hand on the micro handles and one on the main handles.

I started putting my left hand on the micro drive handle and my right on the main. I've been told I was doing it opposite. Since I'm right handed, I should have had my hands the other way. But all my controls are on the right side of the main handles, so I wanted my right hand there for easy stopping and starting. That seemed better, but it still felt a little strange and my back didn't much care for it over time. See, I'm short. 5'2" is pushing it. My Millie has a 26" throat, so when I'm working toward the back of that space, it isn't very comfortable to be reaching that far. I know there is a sweet spot for quilting, but I'm practical. If I have the space, I want to be able to use as much of it as I can.

I have been practicing using the main handles. I figure if Judi Madsen can do it, why can't I?


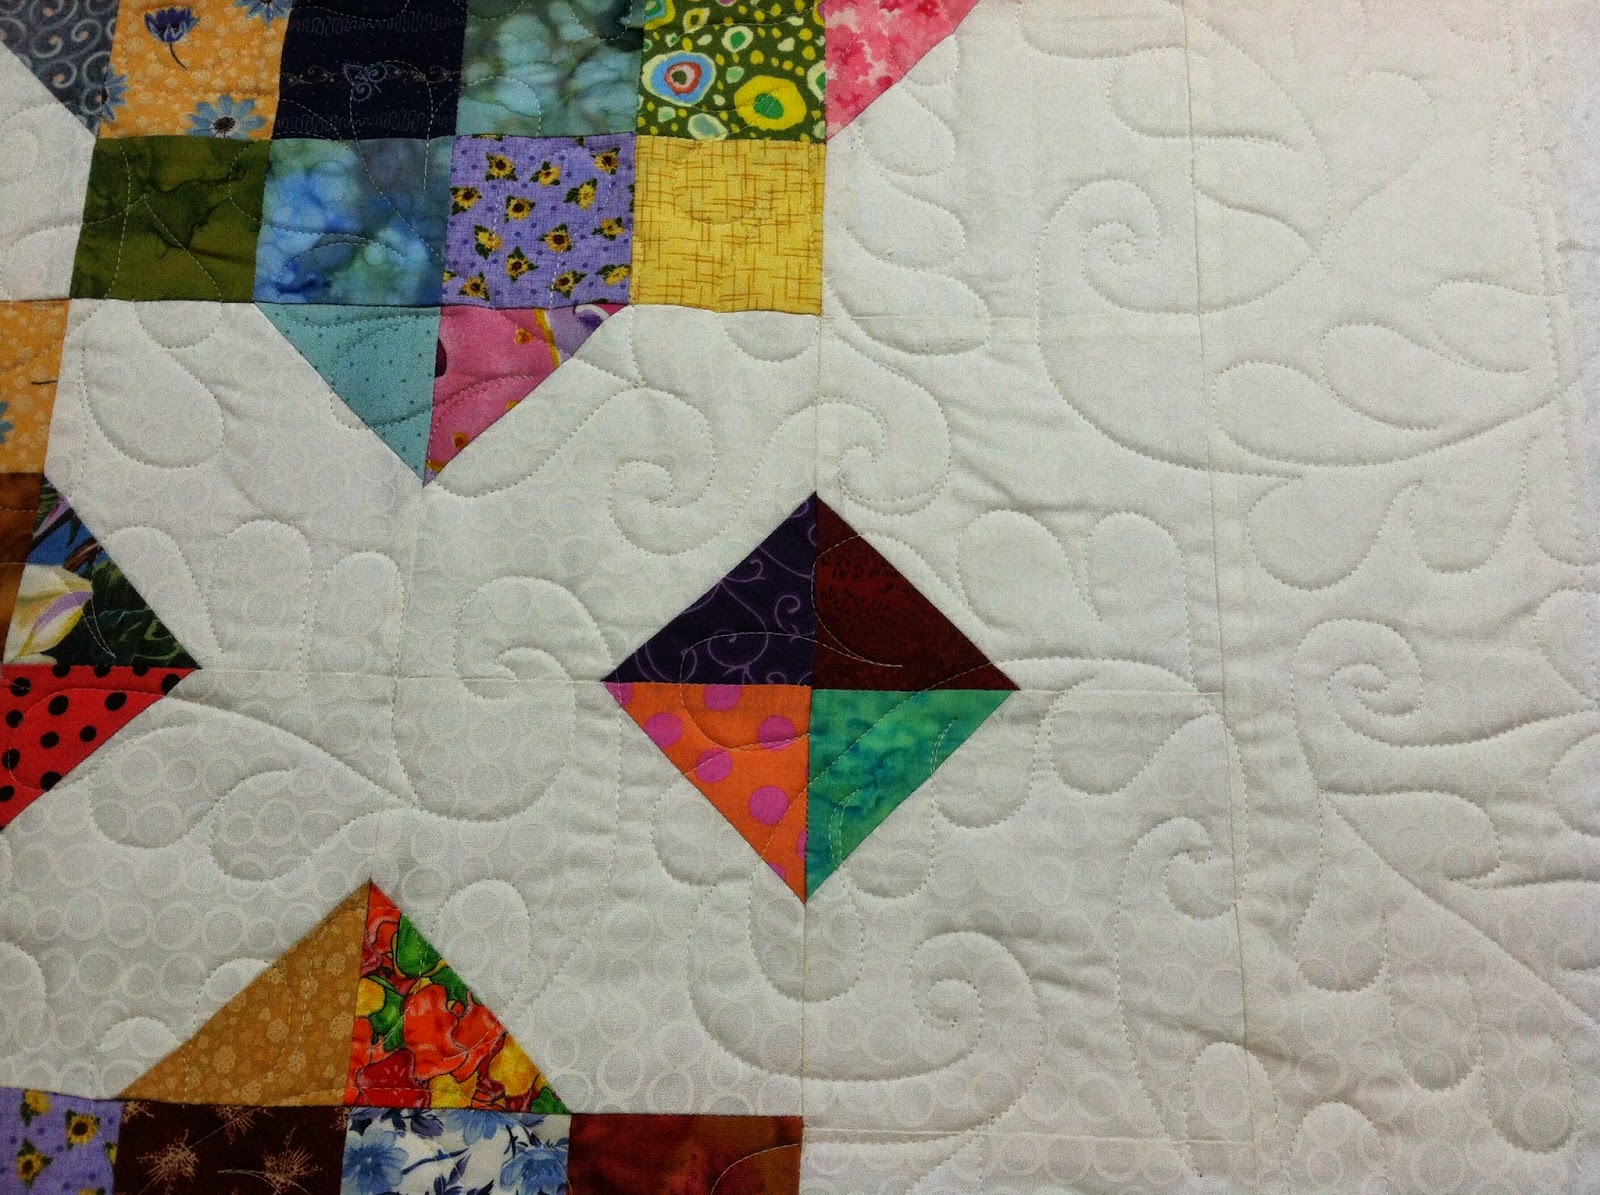
The latest quilt I have finished was chock full of applique, you know, leaves, stems, little berries, that sort of thing. I tossed my applique ruler back in the drawer. It seems like a good idea, but as you may have noticed, applique is not flat. Every time I got near a bulky layered applique (or thick seam for that matter) it would either get caught or lift up a little, threatening to break a needle. I wanted to be able to control the machine without having to worry about this.

So I've stripped Millie nekkid and set to work Schamber slow.


I've been missing the freedom of just freely stitching around applique. You have do to this by hand on a domestic. There's no fussing with rulers and handles. It was slow going, but not nearly as difficult as I imagined. I have loads more visibility without the micro drives, and I don't have to keep flipping them up and down. Up for ruler work, down for precision. Now I can do it all at the same time. And don't let anyone tell you that you can't free hand straight lines on a longarm. I agree that it is easier with a ruler on long stretches, but 6 inch (or even longer maybe) straight lines are perfectly attainable if you don't rush yourself. I feel like I've gained much more control over my machine this way, and my back is thanking me for not leaning over.


I also found another nifty tool. My studio flashlight, essential for checking tension under the frame, seems to be the only workable one left in the house. It keeps getting 'borrowed'. I found this one at Tractor Supply for a whopping $5. It has a hook, so I can hang it off the light bar for accessibility. I was always scrounging around my table for the old one.


It has a LED panel on the side and a small one on the end, like a regular flashlight. Every time you push the red button, it alternates. I'm loving it. I highly recommend it.

Thursday, August 21, 2014

Test Time and Zippered Leaders


No, this is not some new funky modern quilt. I decided to put my muslin aside and buy some 'real' fabric for tension testing. I had to change my tensioner, so I wanted to take some time to retest the tension on the threads I use before I started quilting. I don't know about you, but there is nothing more frustrating than trying to figure out the best tension to use while you have a huge king sized quilt loaded on the machine and 3 inches of backing and batting to work with on the side.

I went to Sewingly Yours and headed to the back and bought some sale fabric for $6/yd. It was almost a shame to use it, sniff, sniff. I loaded it up and started with my most troublesome thread. It is all color coded. Green for Omni, dark green leaves for So Fine, Yellow for Madeira, Red for Signature.


This Madeira variegated thread works great. I got it at Sewingly Yours and it is technically embroidery thread. I had heard great reviews from longarmers and it did live up to its standards.


I quilted each tension setting in grids, using the same design so I could compare the tension. I wrote the TOWA gauge reading for the bobbin with a ball point pen and then the top tension setting. My knob has a notch drawn on it so I can adjust it more easily. If you are a new longarmer and you haven't done this, I highly recommend it.


I had heard horrible things about Signature thread in longarms, but it worked really well for me. I just had to reduce my bobbin tension way back. Somewhere around 100, instead of the usual 160-170 that my other threads like. I'd like to get a bigger cone of this and test it out on a baby quilt to see how it holds up. I wasn't gentle on this sample, but no breakages so far.


I even tested out different batting. Each little green square had a different batting and I wrote underneath what it was. I used Warm & White, Joann's cotton, Dream Cotton Select, Dream Poly Select, Pellon cotton, and Dream Wool. My plan is to stick the whole piece in the washer and dryer and see how it all looks after washing. So far I'm liking both Dream Selects and the wool the best. The Warm & White is a bit stiff. Great for wall hangings, not as nice for a comfy lap or bed quilt.


The next thing I did was install my new zippers. Everywhere I go, everyone says that zippered leaders are the bomb. Get them ASAP! They are very useful for getting quilts on and off the frame quickly. You've quilted to the bottom of the quilt and you realize there isn't enough backing? Got to wait several days for the quilter to get some more? Unzip that baby and zip a new one on, easy peasy. No fussing with pinning and unpinning. These little difficulties always happen on large quilts, don't they? So I finally took the plunge and picked some up from Kingsmen Quilting Supply.

I managed to get the main ones sewn onto the canvas. I sent a pic to my friend Gina B. She was horrified that it was just zippers that came, no canvas. See hers came already sewn onto her leaders when she got her new machine. And the side of the zipper that isn't sewn onto the canvas attached to the frame has a strip of canvas sewn onto it. It is way easier to pin to. Zippers are not very wide and are very fiddly. And it helps keep the zippers from distorting over time.

Well it just so happened that I had 5 yards of canvas that has been sitting in a chest for years. It was supposed to be for a chair cover until I realized it doesn't wash well. But it is perfect for this.


I cut a 6" strip and sewed it onto one side of the zipper, then I made a 1" pocket at the other end. This is the end that you pin your quilt to. The pocket is also useful if you buy Renae's Red Snappers. In case you are wondering why the two pieces aren't the same length, the zippers were longer than my leaders, but I cut the canvas strip the same length as the zipper.


I ordered a complete machine set, and an extra set. So that lets you have two quilts on the go. But it turns out if you don't use the quilt top zipper (like if you are floating quilts), you have another set! So now I can swap out three quilts if I wanted. Maybe I'll work on a project of my own in between clients' quilts. Zip on, zip off Mister Miyagi!

Friday, August 15, 2014

Trish's snowman quilt


Trish made this beautiful snowman quilt in one of Kathleen Baden's classes.


These swirly feathers reminded me of swirling winter winds.


I love these snowmen!


Adorable!


I used the Daisy Swirl panto for Cathe's baby quilt.

Thanks Trish and Cathe!

Tuesday, August 5, 2014

AQS Charlotte!


So here I am at the AQS Charlotte show. I went last Wednesday and had a great time. It was so exciting to see my little wall quilt hanging up next to all these amazing quilts!

The only thing I did not have time to do was play on all the longarm machines.

I did try the new Millenium. Those Bliss rails are amazing. Unfortunately, I'd have to buy a new table for my machine if I wanted to upgrade, so it looks like I'll be quilting the old fashioned way, with some friction. Good for muscle buildup and control right?

I did want to try out the Juki, but didn't get around to it. Apparently, word on the street is that Sharon Schamber thinks the Juki is a great machine. Really good as far as tension goes. Go figure.


****I have removed the rest of the photos I took of amazing quilts at this show. Unfortunately, several have been pinned on Pinterest without proper credit given. At first glance, the quilts looked like they were my work because they came from my blog. I have posted comments with the names of the quilts and the artists on the Pins I could find. So in order to be sure there are no more cases of mistaken identity, I'm taking the rest of the photos off my blog. I'm sure you'll see them again on magazine covers:) Sorry for the mix up!

Tomoe's Mexican star and some pantos


This is the second Mexican star that I have quilted. The last one was done on George and wasn't quite this detailed. Tomoe asked for custom quilting.


Love how these feathers turned out!


Here is another one of those mystery quilts.


This one was also quilted with the Feathered Curl panto.


Sharon asked for a modern look on this baby quilt.


I used the Bauhaus panto, which is very modern and looks amazing on these type of quilts.