Sunday, March 31, 2013

Adele's quilt


Adele started quilting this quilt for Sew Original's Solid Challenge on her own machine. She had quilted about 1/4 of the quilt and her machine started acting up. She had to take it to the shop and leave it while they tried to figure out what was wrong.  She asked if I would finish this for her.


She wanted straight, well, not quite straight lines on all the light gray fabric to give it a nice modern look. Perfect! I got to go super fast on my machine and not have to worry about the lines been exact. So much fun!


Thanks Adele and good luck!

Tuesday, March 26, 2013

Help, the dog ate my quilt!


Laura came to me with a quilt that she had started 20 years ago! She had taken a class and had pieced this all-flannel lap quilt and started quilting around some of the squares. Then the teacher left town and this quilt has been languishing in a dark cabinet somewhere:) Laura decided it was time to get this quilt finished so she brought it to me.

 
Have a look at these plastic ties! Apparently, this was the fashion for basting when Laura took the class. The upside was that I didn't have to baste the quilt and I could get started quilting right away. The downside was having to cut them all off as I went along. I was terrified that I would hit a piece of plastic with the needle or cut the quilt trying to get them off. I was fortunate not to experience either of those things, but they still keep popping up on the kitchen floor in the most unexpected places:)
 

So, anyway, Laura calls me up a few days later. Help! she says, my dog ate my quilt! Can you fix it?


Hm, that really is the question, isn't it? Her puppy, a humongous, innocent-looking, white Great Pyrenees named Lady, really did a number on this quilt.


Doesn't she look sweet and harmless;)


And this corner is no longer even in existence! I know it is possible to 'quilt as you go', so I looked online to see how it is done. The video I watched presumed that there was actually backing AND batting fabric upon which to 'quilt' pieces as you go. Obviously not relevant in this case:)


So what did I do? I trimmed off the bad corner leaving a nice triangle. I cut out a piece of backing fabric. Stitched them right sides together and then did the same with the border fabric. Of course it always works out that the fabric you need is the fabric you don't have. Laura had plenty of leftovers of everything but the dark blue. Fortunately, she still had some of the other blue, so I used that one. I sandwiched a piece of batting in between and quilted over the whole piece.


Then I bound it normally, just folding the ends of the binding under 1/4".


I pieced some patches to cover where the rips went across seams and then turned them under and topstitched them and quilted the design over the whole thing again.


You can see the seam lines, but it isn't as noticeable as it could be. In fact, it took me a second to find the patches so I could show Laura what I had done. All in all, success I think:) Now I can self-style myself as a restorer, hehehe. No thanks! Think I'll stick to quilting and leave restoration to the professionals, barring any emergencies:) Thanks Laura!

Friday, March 22, 2013

Trying to switch over

Just when I got comfortable with Google Reader, I have to switch.

Guess I'm supposed to copy this link?
<a href="http://www.bloglovin.com/blog/5113969/?claim=fdwfmx7rcn6">Follow my blog with Bloglovin</a>

Let's see if this works. Fingers crossed!

Friday, March 8, 2013

Japanese tea cup quilt


Yay! She is finished at last! I have been working on this quilt for what seems like ages! A block here, a block there in between customer quilts. I pulled this pattern out of the August 2009 edition of American Patchwork & Quilting. It is called Steeped in Tradition and it was designed by Diana McClun and Laura Nownes. I have a binder of patterns or just photos of quilts that I like and I finally had a chance to give this one a go.


It was so much fun picking out these fabrics. I stuck fairly close to the colors of the original quilt. I was really hoping I wouldn't have to buy online thinking it would be extremely difficult to match fabrics over the Internet. Fortunately, Sewingly Yours had a great collection of Asian fabrics. Still, I stood there for an hour in the store, putting fabrics next to each other and standing back staring. My son obliged me by playing his Nintendo DS very quietly in the corner so it was okay:)


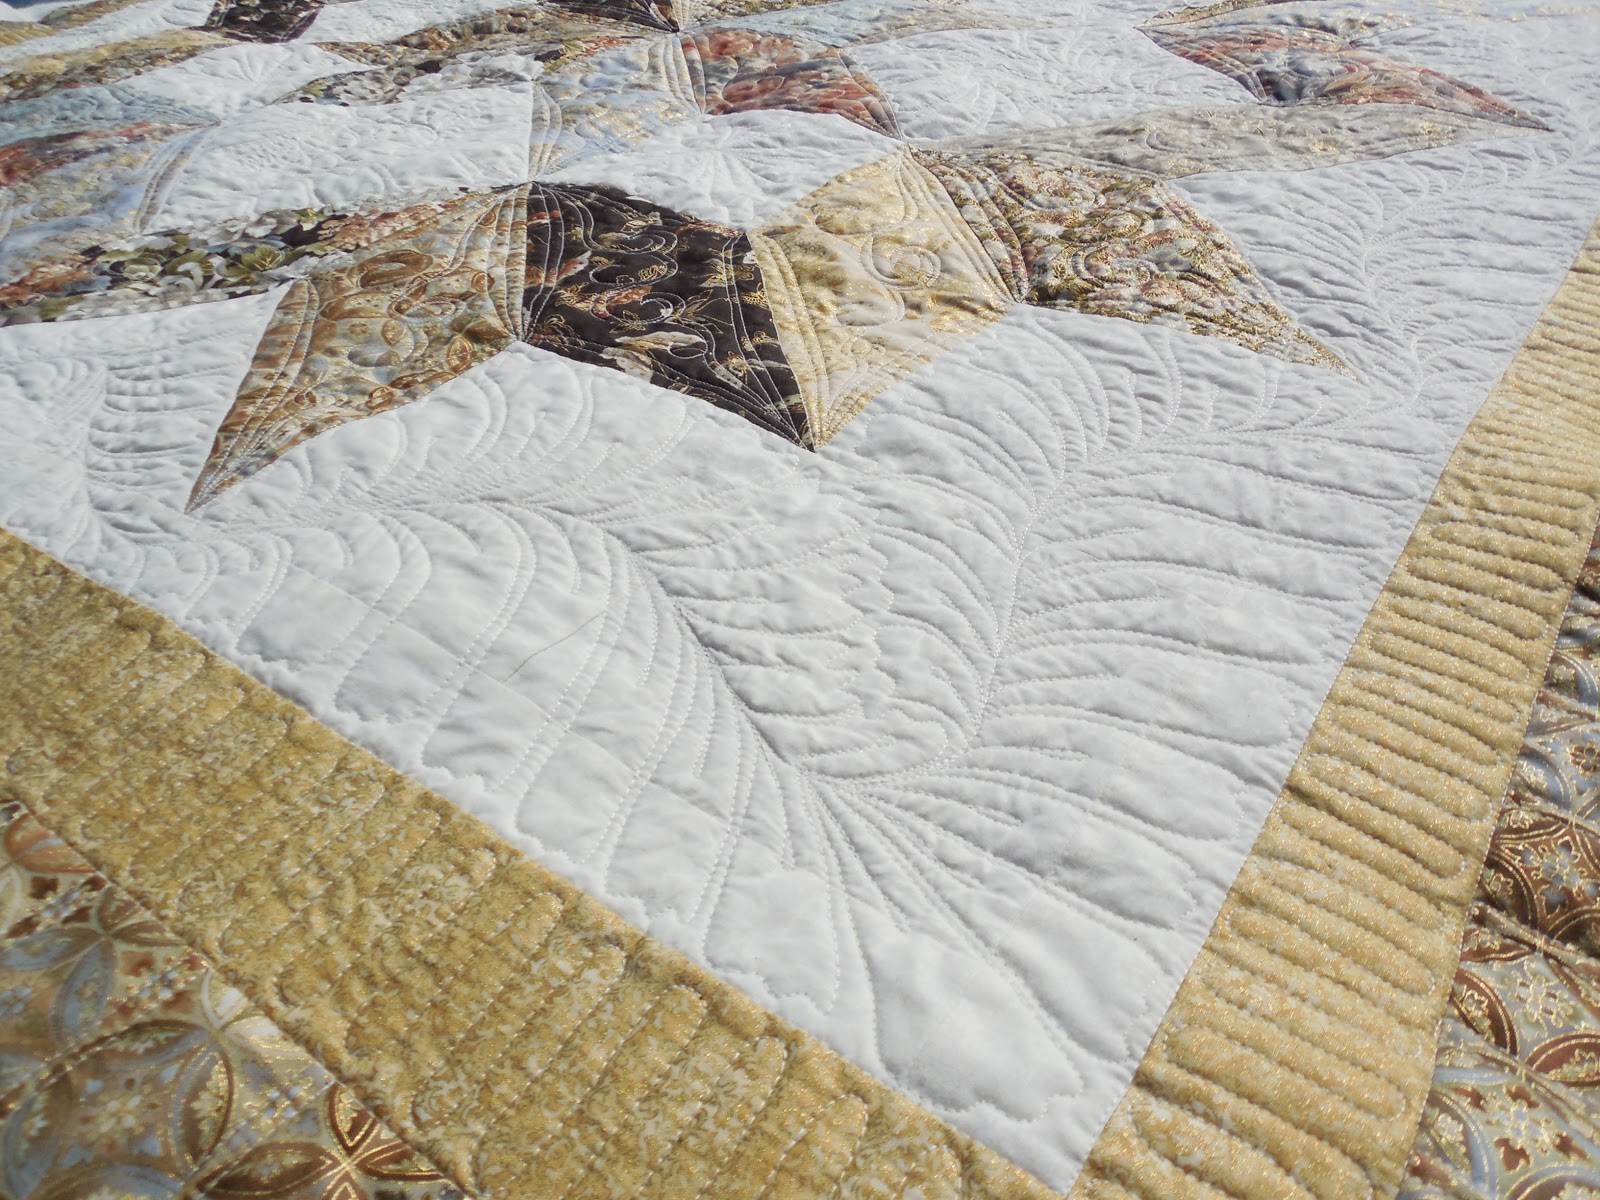
I knew I wanted to densely quilt this one and the tea cup blocks were the easy ones. I love Angela Walters filler designs and I was dying to try one out. The cream fabric was perfect for showing the design well. By the way, that is a quarter in the top left corner to give you an idea of scale. I used a cream thread to match the background for these squares.


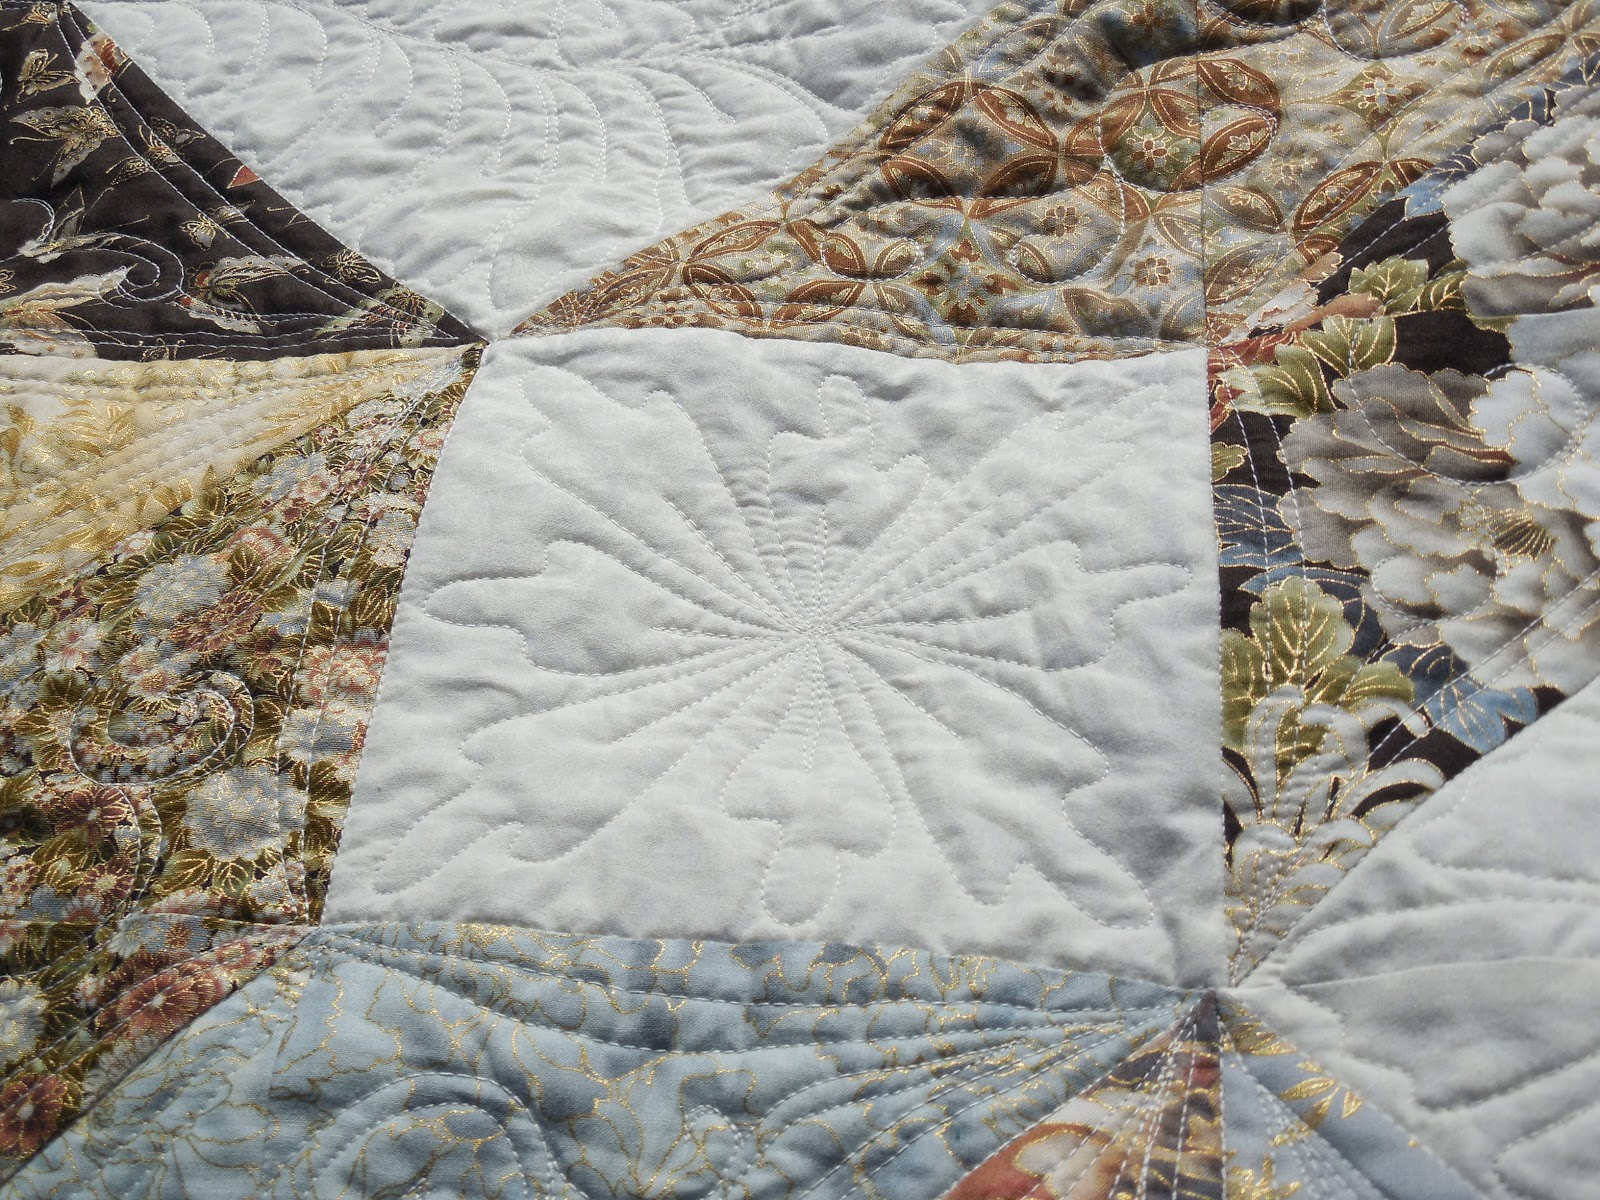
This koi/floral block gave me a lot of trouble design-wise. My original plan was to do an Asian feather block design. I grabbed my gold metallic and set to work. Not only was my machine unimpressed with the metallic, but the design really clashed with the gold in the fabric. I spent an hour picking it all out and decided to simply quilt around the lines on the fabric. Not as exciting, but it really helped emphasize the lines. I ended up picking gray thread and quilted some watery swirls on the bottom piece to bring it all together.


I probably should have quilted some nice water swirls on the teals as well, but I got a little carried away wanting to do something 'extra' special. I picked out some designs I liked and put them all into this fan design. The gray thread was the only color I had that showed the design on each piece.

Just before I finished the quilting, my friend Carrie posted a pic on her blog of her binding being held on with clips as she was sewing it onto the back. That seemed like a great idea to me. Of course, I am saving up for a longarm (ha ha!) and I don't really want to dish out any more money. Since I am one of those old fashioned people who still hangs clothes on the line, I have loads of clothes pins. Seemed like the same kind of idea, so I gave it a try.


All in all, it didn't work too badly. The clips stayed on for the most part and, aside from them making the quilt a little heavy, I didn't have to worry about any kids running into the kitchen and stabbing themselves with pins. A win, win all around:)


And since it isn't too cold, or windy, today, I decided to try some new photo shoots, and settings. My new camera makes my quilts seem really bright. I found a beach setting and it is giving me some color back, yay! The little dog decided to walk directly across the quilt the second I laid it out. Thank goodness it is a dry day as well! Best keep the dogs in next time:)

Thursday, March 7, 2013

Rosalind's quilt


Rosalind brought me a small wall hanging that she had appliqued. I stippled around the applique designs to help them 'pop' out. Then I quilted a simple leaf design on the borders and sashing.
I didn't want to quilt too tightly and draw attention away from the blocks.


Thanks Rosalind!

Monday, March 4, 2013

Joanne's quilt

 
 Gloria Bruce referred Joanne to me. Thanks Gloria! Joanne brought me this gorgeous queen size quilt that she had made using Asian fabrics. She was thinking of an edge to edge pattern, but I convinced her to let me do some custom work:) The cream tone-on-tone fabric was just crying out for some feathers!


I used the Asian feather design from Carla Barrett's blog. I just meandered the feathers around the outer cream spaces and the larger cream squares. I still can't get over how much fun this design is!


I stared at the Asian patterned star for a while contemplating the possibilities before I decided on a photo I had seen on Pinterest of one of Judi Madsen's quilts. Her blog, Green Fairy Quilts, has some great ideas and amazing quilting.


Then I decided to do something a little more linear on the outer borders to contrast all the swirling in the center. I quilted straight lines on the final border with 1/4" lines in between. I think it helped accent the circles instead of detracting from the design by quilting something busy on top. And the best part was I could follow the circles and quilt the lines without having to mark:)


Thanks Joanne!