Friday, July 26, 2013
Shirley's quilt
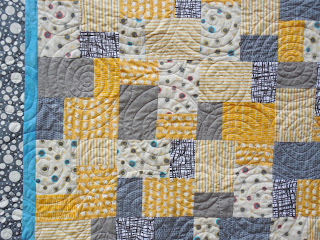
Shirley made another Pave the Way quilt for me to work on. Love this pattern. So simple, but lovely.
She chose a darker purple thread than I would have gone for, but it really looks great! Sometimes it is just better to go bold! I can see all my swirly feathers now:)
Thanks Shirley!
Jonnie's quilts
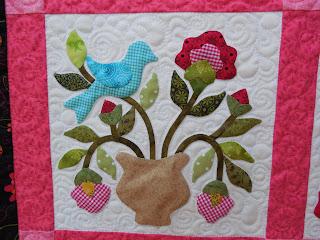
Jonnie made this gorgeous applique quilt for a block of the month class that she is teaching. It is all hand appliqued with teeny tiny little stitches. Beautiful!
I quilted pebbles and swirls in the background, with swirls on the pink sashing and straight lines in the outer border.
Loving her color choices!
This quilt is so bright and happy!
This quilt is also for a class. She asked me not to post it when I finished it, but it is hanging in the shop now (Knit One Smock Too) and it is ok now.
I quilted an edge to edge Asian floral design on this one. I don't think I'll ever get enough of that design. So much fun!
Thanks Jonnie!
On a side note, the APQS George I ordered is preparing for shipment. No more skipping stitches on thick seams, hooray! I'm so excited. I can't wait!
Sunday, July 21, 2013
Joanne's minky baby quilt
Joanne brought me this adorable baby quilt complete with chevron minky background. Now, I'm a cotton girl myself (with a little linen thrown in here and there), but this minky is soooooo soft. Makes me want to just sit there and pet it all day:)
I quilted circles to offset all those straight lines.
Isn't that a cute backing?
Thanks Joanne!
Tuesday, July 16, 2013
Purses and palm trees
Summer is slow for quilting I'm discovering, so I've had a chance to work on a few projects of my own, which is really nice! I bought this amazing lizard fabric on my jaunt to the Raleigh quilt show and I decided to make myself a matching set of accessories: purse, phone cover and a Kindle case.
I used my go-to pattern for iPhone cases by Amy Friend of During Quiet Time. Super easy and makes a beautiful cover every time. I love linen and this is a great way to showcase my new fabric.
I measured an old across-the-body bag that I bought at Target ages ago and made a pattern for the purse. I even got to use up some trim/cord that I had left over from a chair project. It is all on the inside, but oh well. The lining of bags can be pretty too, right? I added a strip of wool batting in the strap for extra comfort:)
And now to the palm trees. Back in April, my aunt in Florida sends me a text. With the above photo of a palm tree included. Could you make two of these, she asks? She had seen this fabric palm tree in a shop in Florida and wanted some for her house. Sounded like fun. Palm trees? Sure, why the heck not!
Step one: Fabric store! Who doesn't want to go to Sewingly Yours with their amazing selection of batiks?And this time I was armed with an iPhone, not a flip phone. This makes long distance fabric shopping a breeze! I texted pictures of fabric to my aunt and she picked the ones she liked. We narrowed it down to these:
Nine different fabrics for palm fronds and two for coconuts. Of course, when you cut out fronds, there are plenty of little scraps all over. On a side note, my daughter has been helping me cut out 1 1/2" squares from these scraps to make a nine patch quilt, yay!
My aunt said she thought the fronds were about 3 feet long and maybe 12 inches wide, so I sketched a template and cut them out. I sewed a track all around the outside of the fronds for the wire and one straight down the middle. I picked up some wire in a roll at the local hardware store. It was perfect for bending around the shapes, but not strong enough to support the frond. I managed to find enough hangers in my closets to make up for that.
I used 4" PVC pipe and cut it down to 7 1/2 feet. I wrapped one layer of batting around it and then set in with the burlap, tucking folds as I went along and sewing them all down. A couple of styrofoam balls left over from another project where perfect to stick in the top end. All the fronds with go right through that like those fake flower arrangements.
I didn't want to stick all the fronds in and ruin the ball too soon. These babies are getting shipped to Florida. So only one frond for this pic. Will follow up in the future with on-site photography:)
Friday, July 12, 2013
Carrie's Christmas quilt
Carrie was given this quilt by our quilting guild. It is tradition to give a quilt top to the guild president whose term is ending. Carrie said she wanted a holly leaf pattern for the background and to just have fun with the blocks.
I quilted a different pattern in each group of blocks. Some of the blocks repeat. I like the circular pattern on the log cabin blocks. Strangely enough, it doesn't remind me of ornaments, but the circular glass pieces you find in doors in England and Wales.
Thanks Carrie!
Saturday, July 6, 2013
Wholecloth wall quilt
This is my first wholecloth wall quilt. I made a wholecloth bed quilt one year, well, hand quilted it too, but it was not quite as detailed. I was inspired by Kelly Wood's post about thread. She mentioned silk thread and I thought that sounded really interesting. Of course, if you are going to spend the money on silk thread, you really want it to show up well on the fabric. So I picked white Kona and a light gray silk thread.
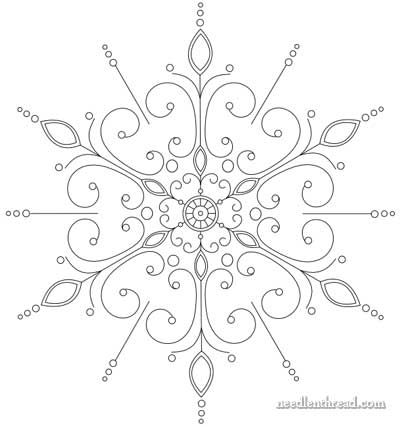
The whole design process took about a month. I love Cindy Needham's fancy wholecloth quilts, and I wanted to try something along those lines. I was thinking of a medallion in the middle at first, with lots of fancy borders, but then I stumbled across a really pretty embroidery design on Needlenthread.

The only problem with that design is that it might get lost in the quilting since it is only straight lines. I wanted the design to pop out once I started quilting heavily in the background. I love iron scroll work, so I started looking online for ideas and drew my own pattern by hand.
Then I cut it out, traced it onto cardboard and cut that out and traced it for the center motif. After the first scepter, I was starting to wonder if maybe there wasn't an easier way. I drew the outer scepters on paper, marked it heavily in black, and then put it under the white fabric to trace. Voila! Much better.
I made good use of my Frixion pen. I was a little wary at first. Some people have said that the marks come back in cold weather. However, my blue marking pen was a bust. Most of it had faded by the end of the day. Humidity is not its friend. So I sprayed it down and started over with the Frixion. I'm not planning on putting this quilt in the freezer, or leaving it in a car on a winter day, so I think I should be fine:)
I quilted the main design and borders in the gray silk. Love it! Smooth as silk, hehehe! I just got some gray Glide thread and I put that in the bobbin. Looks like silver metallic on the back, but without the headache. Who knew!
When I had all the outlines done, I set to work with 45 weight white cotton in the top and the bottom. Teeny tiny stipple. It got a bit tedious after a while. 8 of the 13 hours quilting were spent stippling. I found that my Fabulous Fabric Glide worked great for this kind of detailed work. I did it an hour here and an hour there. My eyes couldn't take any more than that. I thinking I am stippling in my sleep now.
I love this fabric I used on the back. I've had this yard of batik for a while, but have never found the right use for it. I know you are wondering why I wasted a good batik on the back of a wall quilt, but I didn't want to use plain, boring fabric. And I love the result.
It reminds me of some sort of ancient temple buried under the sea. Like you can just make out the elaborate stonework through the water.
I think I'm going to call this one 'Atlantis'.
Thursday, July 4, 2013
Sofie's quilt
I made this quilt for the daughter of my daughter's teacher. Sofie is only 8, but she has been battling cancer. It was in remission, but it is back again. She has been spending a lot of time in the hospital and my mom suggested that it might be nice for her to have a quilt to brighten up her room. I thought it was a great idea.
I had a lot of small scraps left over from Holly's quilt, so I cut them all down into 3 inch squares and set them into a grid pattern. Then I quilted my favorite swirly feathers over the whole thing.
I heard she was a big fan of horses and I wanted to do something a little different so her quilt would be unique. I found a free clip art silhouette of a horse and printed it and traced it onto a piece of Wonder Under. My daughter helped me cut out the shapes and I fused them onto the quilt and top-stitched over them.
Then I stitched her name in a pretty script so it would look a little fancier.
We'll be praying that the treatment works well and puts her cancer back into remission. If anyone would like more information, you can access her Caring Bridge website.
Subscribe to:
Posts (Atom)


.JPG)


